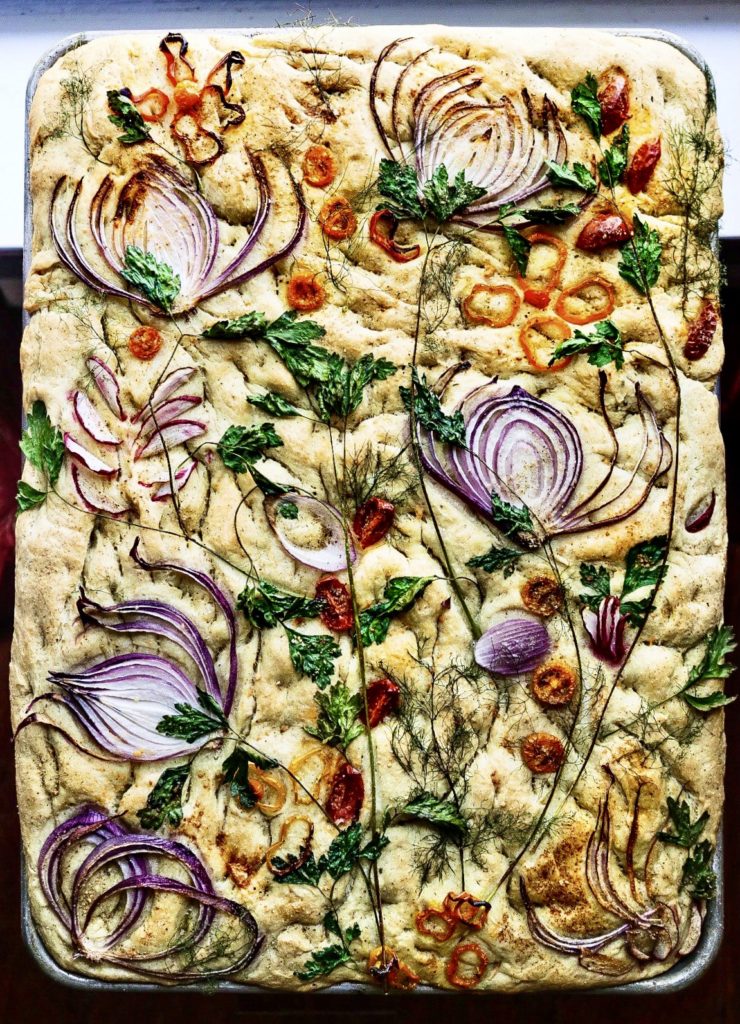
Yesterday was Mother’s Day and what better way to say, “I love you” than with a pan of my favorite bread made to look like mom’s favorite hobby? (Not to mention, the herbs used in this stunning masterpiece came straight out of her garden.)
Bread art is a thing. It’s a thing I learned in culinary school, but mainly consisted of basket-weaves and lobster shapes for gaudy buffets. Hard and glossy, inedible and very 80’s. During the recent stay-at-home order of 2020, we saw a rise in bread art that came along with the oh-so-laborious and nearly impossible to perfect sourdough trend driving yeast and bread flour shortages across the world. Then just like that, instagrammers were turning flour and yeast into canvases leading to the re-birth of beautiful “garden focaccia”. I believe in the saying that food should taste just as good as it looks, and this bread is equally breathtaking as it is delicious. I’ve held my famed recipe under lock-and-key for only those who truly understood the magnificence of bread making. Time, patience, intuition and about 2 cups of olive oil. That’s what it takes to make great focaccia.
CHEF’S NOTES
Any bread flour is fine. I cut mine with a little 00 if I’m using the focaccia for sandwiches, it makes a mean muffuletta. The true secret behind making my focaccia is watching for the second rise in the pan. The dough should begin to curl up the sides and onto the cling wrap. That’s when you know it’s ready. Don’t even think about putting it in the oven before this begins. Trust me on this. For the yeast, IDY or fresh works. If you can find fresh yeast, double the amount stated in the recipe. Be as playful and creative as you want with the ingredients, but don’t skimp on the olive oil. Key is to really push that extra virgin gold into the crevices and don’t be afraid to handle it roughly. It’s resilient and will mould into whatever pan you stretch it into. For the garden veggies, select a variety of herbs and veggies that not only provide flavor but splashes of color. I like to lay out the cut pieces on a piece of parchment to create a scene before transferring to the proofed dough.

| Prep Time | 45 mins |
| Cook Time | 15 mins |
| Passive Time | 1-2 hrs |
| Servings |
sheet
|
- 1 oz Instant Dry Yeast (2 tbl) sub 2 oz fresh yeast
- 8 oz Water ambient
- 1.5 oz Honey
- 4 oz Bread Flour
- 44 oz Bread Flour 2# 12 oz
- 1.25 oz Salt
- 3/4 tbl Black Pepper
- 1 tbl Rosemary & other herbs
- 20 oz Water cold
- 8 oz olive oil + plenty extra for the pan
- 1 bunch Mixed Herbs Parsley, Rosemary, Scallions/ Chives, Fennel
- 1 whole ea Carrots, Bell Peppers, cross cut
- 1 whole ea Red Onion, thinly sliced
- 2 whole Red Radishes and Cherry Tomatoes, thinly sliced
- 1 tbl Mixed dry herbs, pepper, salt, parmesan, seeds
Ingredients
Pre-Ferment
Dough
Toppings
|
|
- In the bottom of your mixing bowl of your stand mixer add yeast, water and honey. Allow one minute for the yeast to begin hydrating. Add 4 oz of flour and whisk together until a thin paste forms.
- Sprinkle second portion of flour on top of the paste. Follow with the remainder of the dry ingredients. Do not disturb the layers and do not add the salt before the flour as this will kill the yeast. This is called the autolayse, an essential part of the early gluten development. Reserve oil and water until ready to mix.
- Wait between 15-30 mins for the yeast to activate. Once the flour has "cracked" and the yeast paste begins to creep up, it is ready.
- Place the bowl on the mixer and add the oil and water. Mix using the hook attachment, on low, for 6-7 mins until the dough is smooth and thoroughly combined. If mixing by hand, knead dough until gluten feels developed but still smooth and elastic.

- Add a drizzle of olive oil to the top of the dough, cover and allow to rest for 10-20 mins.

- Drizzle a 1/2 sheet tray with plenty of oil, spreading to the sides and leaving plenty on the bottom. Transfer the dough to the pan and begin pulling, stretching and shaping the dough into the corners and sides. Add additional olive oil to the top and using your fingertips, push the dough deep until you reach the bottom of the pan, creating a dimpling effect. Give it a proper massage.

- Cover only the top of the pan gently with cling wrap, making sure not to not wrap the sides. The cling wrap should rise with the dough allowing enough room for the dough to "crawl" up the wrap. This process takes about 1 hr. During this time, begin cutting the vegetables and herbs for your bread.

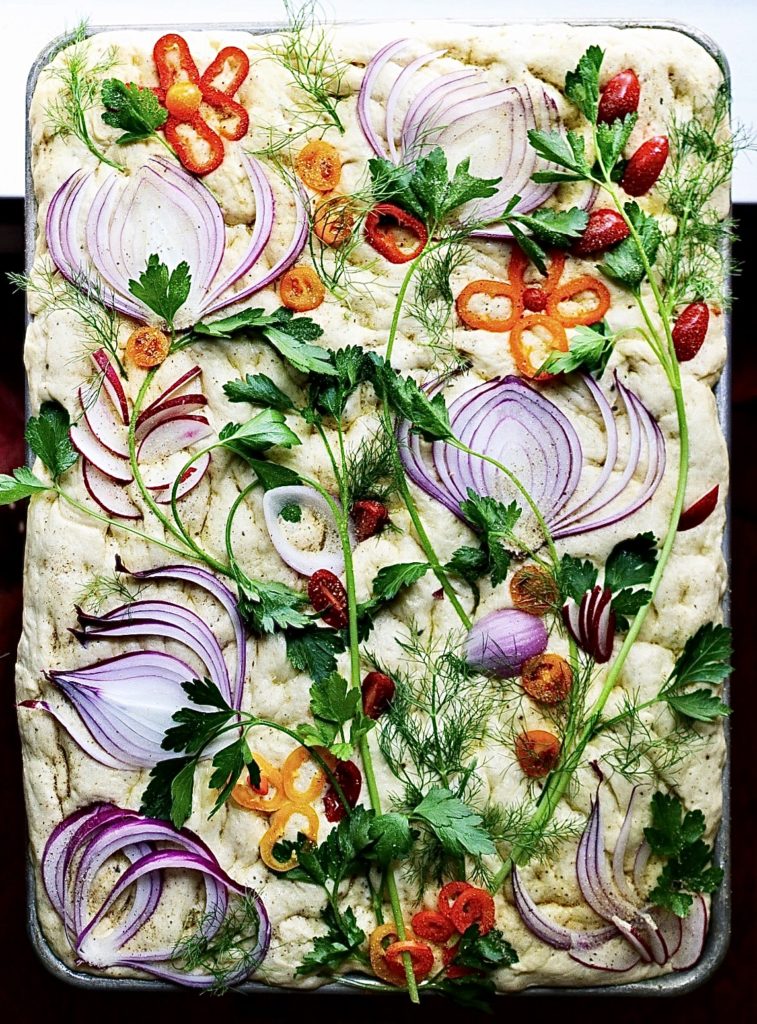
- Preheat the oven to 375f degrees. Remove the plastic cling wrap. Arrange the vegetables gently on top of the dough canvas. Use items such as parsley, thinly sliced red onions, peppers and radishes for flowers. Work quickly as the dough is time sensitive. Sprinkle pepper, dry herbs, and salt to season. Drizzle additional olive oil or butter if you desire a glossy look.

- Transfer pan to the oven and bake until golden brown about 15-20 minutes. If the vegetables begin to brown too quickly, reduce the temperature and add an additional 5 minutes to the bake. The bread should register above 200f degrees before removing from the oven.

- Drizzle with more olive oil before serving.